Creating your own Collection at Live Local
location based services
Tutorial: How to Create a Collection
Creating your own Collection at Live Local to share with others is really easy and takes just a minute or 2 to start. Then how much time you spend adding to and editing your collection is completely up to you. Follow these steps to create your first Collection, and when you’re done be sure to submit it on the Submit a Collection page. In this tutorial, We’ll create a Collection of my favorite indie music stores in Seattle, but you can easily diverge and Collect whatever you like as we go.
1. Create a MSN passport or Live ID if you don’t have one.
Live ID is the new name for MSN Passport. If you have a Hotmail address or use MSN messenger, you already have a Passport and can skip this step. If not, got to http://login.live.com to create an account. Click the ‘Sign up for an account’ link. Your Live ID gives you access to all of MSN and Live.com services and is used by Live Local to protect your personal Collections.
NOTE: A Live ID is required to create collections, but others who view your Collections are not required to sign in. Sign in is only needed to create and manage your own Collections.
2. Go to Live Local and Open the Scratchpad
To make it easy to follow along, open Live Local in a second window and switch back and forth. Open the Scratchpad by going to the ‘Collections -> Open’ menu. This is found on the main menu bar, just above the map.
The Scratchpad is the tool you use at Live Local to create and manage your Collections. When it is first displayed it will show your ‘Unsaved Collection’ and invite you to sign in to save this collection like this:
Go ahead and click the Sign in link. Use your Live ID / Passport that you created in step 1. You’ll be returned to WLL after sign in.
3. Save Your Empty Collection
Now that you are signed in, you can give your Collection a name and Save it. In the Scratchpad, you will see a message that says ‘This Collection is not Saved’. Click the ‘Save’ link to display the properties panel for the Collection. Provide a Name and optional description for your Collection, as I have done in the screenshot below. If you want to share your collection with others, check the ‘Public’ checkbox. (Hint: you can go back to the Collections properties panel at any time to update any of these settings)
Once you hit the Save button, your new Collection is committed to storage. All changes you make to it are automatically saved for you! you never need to worry about saving it again.
4. Add the first item to your collection
My first music store will be Easy Street in West Seattle. To find it, enter ‘Easy Street’ in the first search field and ‘West Seattle, WA’ in the second and hit enter. The map will center in West Seattle, and a pushpin appears on the map. Hover your mouse over the pushpin to display its popup. In the popup, Select the ‘Add to Collection’ link, and just like that you’ve added the first item to your Collection. The Scratchpad now looks like this:
An item was automatically added to your Collection to mark West Seattle when you searched for it. You can delete this by hovering over it in the Scratchpad and hitting the ‘X’ that appears.
Let’s edit the entry to give it a friendlier name than the default Yellow Page listing name, and also specify some extra info about the store. To do so, hover over the entry on the Scratchpad (or it’s pushpin on the map) and select ‘Edit’ in the popup. I’m going to Edit the name and also specify a Web link to the stores website (http://www.buymusichere.net/stores/easystreet/) . I’ll take a moment to write a brief review of the store in the Notes field as well. Finally, I add a URL to a photo that represents this entry (http://www.buymusichere.net/stores/easystreet/user-images/ESstackedlogo.jpg) The Edit panel looks like this:
Hit the save button and your changes are automatically saved in storage. Hover over the entry to check your changes in the popup. You should see a thumbnail of your picture (clickable to see the full picture) and the ‘More info’ link in the popup should open the Easy street website in a new window.
5. Adding an arbitrary point to your Collection.
In step 4, we searched for a business and added it to a Collection. but what if you want to add a business that you can’t find in WLL, or you want to add a place like a park that isn’t a business at all? Easy! just right click on the map and select the ‘Add Pushpin’ link. The familiar pushpin properties panel appears. Fill it in with your new pushpins details (only the title is required, the other fields are optional) and hit save. you now have a second item in your collection.
repeat steps 4 and 5, adding as many items to your collection as you wish.
6. Share your Collection with a friend, or submit it here at PassThePOI to share it with the world
You can send someone a permalink for your collection. When they click the link, WLL will open and display your collection for them. They can’t edit it or make changes (only you can do that). as mentioned above, they don’t need a passport or Live ID to view your collection either. To get the link for your collection, go to the Scratchpad and hover over the ‘Share’ menu. A few options will appear. You can choose email, and your default email editor will appear with the permalink for your collection in the body. Or if you just want to copy the link to the Clipboard to paste it somewhere, choose ‘Copy to clipboard’ ther ein the Share menu.
That’s about it! be sure to send your Collection permalink to PtP using the Submit a Collection link to the right.
skip to main |
skip to sidebar
A Sextant --- solid brass navigation technology ... from 200 years ago !
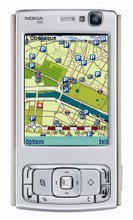
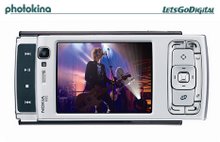
The 2007 << Dream Machine >>
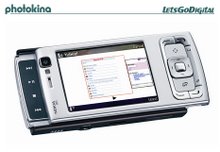
no doubts .. the ultimate smart phone in 2007
where it's at in 2007


... but it didn't catch on

... if you don't know where you've been - BUT - how did you GET here ?!?!
Our focus is on Location Based Services ( LBS ) which answer "Where am I? Where is it? How do I get there?" ... & Location Aware Devices (LADs) such as 3G smartphones, mobiles, cellfones, PDAs and personal wireless platforms. LADs will soon be everywhere [i.e. ubiquitous = DoCoMo]. This blog will stay on top of all things that will help us .... keep on track ... and show us where it's at
GPS SATNAV LBS "Personal Navigation Device"
A Sextant --- solid brass navigation technology ... from 200 years ago !
NOKIA N95
The 2007 << Dream Machine >>
OUR LOCAL TIME ( +10 hrs on Zulu)
Hobart |
NOKIA 95
no doubts .. the ultimate smart phone in 2007
SUBSCRIBE TO THE RSS FEED HERE


YOU'RE SEARCHING FOR WHAT
NOKIA N95
where it's at in 2007
The UBIKWITUS SWICKI
where do you come from ?
Blog Archive
-
▼
2006
(2445)
-
▼
August
(177)
- Yahoo Announces “Go for Mobile” Application for Wi...
- Dash Navigation™, Inc. (www.dash.net), a Silicon V...
- TeleNav GPS Navigator 5.0location based servicesTe...
- ASUS R2H UMPC provides integrated GPS location bas...
- £21m boost for Euro sat-nav system location based...
- Beginning Google Maps Applications with PHP and Aj...
- gate5location based servicessmart2go™ is releasing...
- Nokia Acquires Mapping Software Company gate5locat...
- A meta mashup OCARTOlocation based services
- HP and Cisco to Deliver Pervasive Indoor Wireless ...
- Proliferation of softphones requires implementatio...
- Futuretext: Mobile Web 2.0 location based services...
- Geocoding Solution is based on .NET framework. Aug...
- Retrieve Earthcomber Maps, Data On-Demand location...
- A-GPS Technology from Global Locate Featured in Sh...
- Samsung A870 Mid-Level Phone Released for Verizon ...
- Sprint Showcases at CTIA 2006 location based serv...
- Sierra Wireless Introduces ExpressCard Product Lin...
- Tele Atlas Survey Investigates Navigation Needs on...
- LOC-AID Founder and CEO to Address the Emergence a...
- location based servicesBasic Geo (WGS84 lat/long) ...
- Quantum Leap for Cell Phones location based servic...
- The recent popularization of certain web technolog...
- Build AJAX-Based Web Maps Using ka-Maplocation bas...
- Japanese technologist says "super-athletes only l...
- Casio unveils GPR-100, smallest GPS-enabled watchl...
- Boeing Says Problems Will Delay NextGen GPS Deploy...
- Creating your own Collection at Live Local locati...
- Business Outlook: Strong Consumer Interest in GPS ...
- RedSky’s Latest SLDA Enriched with E911 Protection...
- Eureka Prize for secure information breakthrough l...
- Save on Gas and Avoid Traffic This Fall With Veriz...
- LOC-AID Technologies Receives Honors for Exception...
- Fun with GeoRSSBy Adena Schutzberglocation based s...
- LBS google mashup from UKex googlemapsmania.comlo...
- LOC-AID Technologies Receives Honors for Exception...
- Benefon partners with NAV2 for product launch into...
- Social networkers get mobilisedlocation based serv...
- Yell to use GPS advertising on London buseslocatio...
- Yahoo, go2 In Mobile Search Ad Agreement location ...
- Here is LBS-LEGO man on vacation visit NEW YORK ...
- 'Techno Addicts' pose employer liability, says Rut...
- Japan's New Phones Flatter the Face,Track the Kids...
- Microsoft Launches MapPoint Web Service for Austra...
- New Study Reveals More about Map and GPS Habitsloc...
- How to add Google Search to your Maps API applicat...
- Tele Atlas working with TomTom to provide GPS...
- Advances in GPS: NAVIZONLocation based servic...
- MAPS ARE A TOP-LINE SEARCH CATEGORY ON GOOGLE.COMI...
- people can now get your KML files on their phonelo...
- Google hands Trekkies a new gadgetlocation based s...
- New Harcourts Tech Revolutionises Buying and Selli...
- Mapflow Wins Key ...
- Location based services (LBS) that leverage the Wi...
- LG Unveils L343i i-mode Clamshelllocation based se...
- Mapflow Wins Key Role in 41M European ProjectThe p...
- loc.alize.us location based servicesloc.alize.us i...
- Nokia N93location based servicesNokia N93 and lapt...
- Appellolocation based servicesAppello's focus is t...
- Motorola KRZR K1m Mobile Phonelocation based servi...
- Google Says It Has No Plans for National Wi-Fi Ser...
- Free WiFi from Googlelocation based servicesThis h...
- File-sharing 'darknet' unveiled location based ser...
- FSU geographer charting new territory with hurrica...
- Augmentra: Visualizing the Great Outdoors - GPS ap...
- QALL-ME: EU Commission funded Project for Multilin...
- Mobile Local Comparison Shopping Gets a Boost as G...
- Ofcom hints at 4G auction strategylocation based s...
- Orange SPV M3100 Offers Ultimate 3G PDA Connectivi...
- Cellfire is software for your cell phone.location ...
- Map Publishing from Introducing Windows Live Write...
- How to navigate a GPS purchaselocation based servi...
- Sales of in-car GPS products step up a gear in Q2 ...
- Seeker Wireless location based servicesSeeker Wire...
- Welcome to Virtual Moscow!location based servicesS...
- Microsoft Opens Beta On WYSIWYG Blog-Writing ToolW...
- Firefox knock-off browser promises to start faster...
- Google is putting coupons on the maplocation based...
- Blogs, Wikis, Forums Sway Consumer Opinion, Resear...
- Blogs, Wikis, Forums Sway Consumer Opinion, Resear...
- Google Coupons - But Where’s the Mobile Element?lo...
- Match users to their geo-location with PHP and PEA...
- Palm Release Treo GPS Navigator Smartphone Edition...
- Searching for bargains on Google Mapslocation base...
- Sharpcastlocation based servicesSharpcast, current...
- location awareness in the real world and massively...
- Google MapsTo Let BusinessesLocalize Coupons locat...
- Sumaato Bookmarkletlocation based servicesOverview...
- Mystery SolvedSir John Franklin ( of the North Wes...
- Maptuit’s New FleetNav Service Vendor Locator Give...
- Atomic clocks feel the heatlocation based services...
- MapSacklocation based services- This Google Maps m...
- YouTube becoming important source of real-time, lo...
- The award-winning Destinatorlocation based service...
- 'Blogosphere' expands 100-fold in three years: stu...
- Voice Based Mobile Searchlocation based servicesTh...
- NAVTEQ Announces Availability of StreetMap Data fo...
- mapShedlocation based servicesmapShed Australia (M...
- Mobile internet is still a turn-offlocation based ...
- Chet's Corner: iPod Video On Your StreetPilot loca...
- Crave Talk: Location, location, locationlocation b...
- Japan plans own GPS satelliteslocation based servi...
- GLONASSlocation based servicesGLONASS (Russian ГЛО...
- Compass - Chinese SatNav or Galileo Bluff?location...
- Mapbenderlocation based servicesMapbender is an Op...
- MapBuilder location based servicesMapBuilder is a ...
- Ad campaigns for your tiny cellphone screen get bi...
- Comparing the Mapping Serviceslocation based servi...
- GeoLite Countrylocation based servicesGeoLite Coun...
- LG KG920 Phone Review ( non 3G )location based ser...
- Mashups: The new breed of Web applocation based se...
- Yamaha YAS529Three-Axis Geomagnetic Sensor IC Chip...
- New Zealand Google Maps Mashup Rounduplocation bas...
- More new Google Maps mashups from Australia! locat...
- Google Mobile Mapping is greatlocation based servi...
- Sprint Nextel Announces 4G Wireless Broadband Init...
- imov MessengerWhat are Location Based Services (LB...
- John Hickenlooper: Another GIS Visionary at the He...
- Mapflow to take part in €41m motoring research pro...
- NAVTEQ(R) Data Powers Proxix Solutions for Multina...
- More online mapping tools than ever for NZ locatio...
- Inrix - Nationwide Average Speedslocation based se...
- PublicEarth location based servicesPublicEarth wil...
- 'Seeing shoes' offer help to blindlocation based s...
- Mobiles Lead the Way in Underutilised Deviceslocat...
- mobile local search and content delivery platform ...
- YouTube becoming important source of real-time, lo...
- Business ignores mobile Internet at its perillocat...
-
▼
August
(177)
EARLY SATNAV ...
... but it didn't catch on
you don't know where you going...
... if you don't know where you've been - BUT - how did you GET here ?!?!

No comments:
Post a Comment